
Step-by-Step Guide to Build a DIY Smart Lighting System at Home
Step-by-Step Guide to Build a DIY Smart Lighting System at Home
Smart lighting has become an essential part of modern smart homes. It allows homeowners to control lights remotely, automate routines, save energy, and create personalized moods. In my Tunis apartment, installing DIY smart lights allowed me to set wake-up routines, dim lights for evening reading, and even trigger outdoor lights when I returned home late, saving both electricity and time. A DIY system empowers you to customize every room without expensive professional installations.
1. Why DIY Smart Lighting Is Valuable
DIY smart lighting provides convenience, energy savings, and full control. Smartphone apps let you manage lights from anywhere, while automation ensures lights operate only when needed. Personalized scenes create the right atmosphere for reading, working, or entertaining. Integrating lights with motion sensors, cameras, and thermostats improves home security and efficiency. Choosing DIY allows customization for each room and schedule, making your home smarter at a fraction of the cost.
2. Understanding Smart Lighting Technology
Smart lighting comes in several technologies: Wi-Fi bulbs connect directly to your network for simple control, Zigbee and Z-Wave require a hub but provide reliable mesh networks for multiple devices, and Bluetooth bulbs work locally for single-room setups. Knowing the technology helps plan your system for future expansion and automation possibilities. Practical Insight: I started with Wi-Fi bulbs in bedrooms and later added a Zigbee mesh for living areas to handle more devices seamlessly.
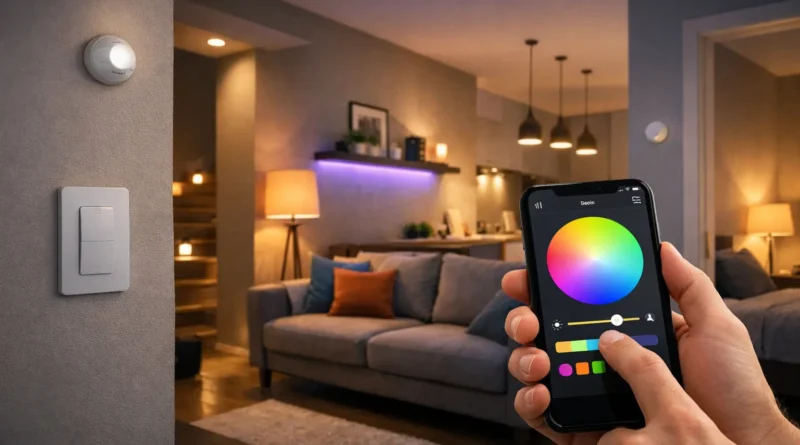
3. Components and Tools Needed
Components: Smart bulbs (Wi-Fi, Zigbee, Z-Wave, Bluetooth), smart switches (Lutron Caseta, TP-Link Kasa), optional hub (Philips Hue Hub, SmartThings), voice assistant (Alexa, Google Assistant, Siri), motion sensors, cloud or local logs.
Tools: Screwdrivers, wire strippers, electrical tester, ladder, smartphone/tablet, notebook for wiring diagrams. Using proper tools ensures safe, accurate installation.
4. Step-by-Step Installation
Step 1: Planning Your System Map each room, noting bulbs, switches, and zones. Identify areas needing automation, dimming, or color features. Consider window placement for natural light. Planning prevents mistakes and saves time.
Step 2: Installing Smart Bulbs Turn off power, screw in the bulb, turn power back on, pair with the app, and test basic functions like dimming and color changes. Tip: Observe colors in natural light for best mood settings.
Step 3: Installing Smart Switches Turn off the breaker, remove old switch, label wires, connect to the smart switch, mount, restore power, and pair. Test both manual and automated control. Safety is critical; consult an electrician if unsure.
Step 4: Connecting to Hub or Voice Assistant Add bulbs and switches to the hub/app, assign devices to rooms, and test automation including scheduled on/off, motion-triggered lighting, and scenes. Proper organization ensures smooth operation.
Step 5: Advanced Automation Create wake-up lighting, evening dimming, bedtime off routines, motion-triggered hallway or bathroom lights, security integration with cameras, and color scenes for reading or parties.
Step 6: Testing and Troubleshooting Check connectivity if bulbs do not respond, verify wiring for switches, ensure correct room assignment for automation failures, and fix flickering by checking voltage or compatibility.
5. Energy Efficiency and Cost Savings
Smart lighting reduces electricity usage through automation. Example: replacing 5 60W incandescent bulbs running 5 hours/day with 10W smart LEDs reduces daily consumption from 1.5 kWh to 0.5 kWh, saving ~67%. Scheduling and dimming further reduce waste. Over a year, a single room can save hundreds of kWh, lowering bills and environmental impact.
6. Practical Applications by Room
Living Room: Color-changing bulbs, presence simulation, integrate with TV/sound systems.
Bedroom: Wake-up lights with gradual brightness, dimming for sleep.
Kitchen: Motion sensors for cabinets, automated cooking/dining scene.
Bathroom: Nightlight automation, short-term energy-efficient lighting.
Outdoor/Garden: Weatherproof bulbs, event synchronization, motion-triggered security lighting.
7. Expansion and Future-Proofing
Add more bulbs, switches, and sensors to cover the entire home. Integrate with smart thermostats for energy optimization. Combine with AI assistants for predictive automation. Use motion and scheduling to simulate presence when away. Upgrade hubs for mesh network support to handle more devices in the future.
8. Safety Considerations
Turn off the breaker before wiring, avoid overloading circuits, use surge protectors, keep wiring organized, update software, and secure Wi-Fi with strong passwords. Following safety practices ensures long-term reliability.
9. Common Problems and Solutions
Connectivity Issues: Check Wi-Fi range, firmware, reset devices if needed.
Switch Unresponsive: Verify wiring, hub connection, and app integration.
Automation Failure: Ensure correct room assignment, update apps, check hub status.
Bulb Flickering: Check voltage, compatibility, or replace with supported bulbs.
Voice Command Issues: Ensure devices are linked to the correct account, update assistant software.
10. FAQ – DIY Smart Lighting
Q1: Can I mix brands of smart bulbs? A: Yes, but a consistent ecosystem simplifies automation.
Q2: Do I need a hub for advanced features? A: Wi-Fi bulbs work standalone; hubs enable multi-device coordination and AI.
Q3: Will automation save electricity? A: Yes, especially with motion sensors, dimming, and schedules.
Q4: Can lighting integrate with security cameras? A: Yes, lights can trigger when motion is detected.
Q5: Is DIY installation difficult? A: Bulb installation is easy; switches require caution and basic electrical knowledge.