
Practical Guide to Building an AI-Powered Personal Assistant at Home
Practical Guide to Building an AI-Powered Personal Assistant at Home
Artificial Intelligence has become increasingly accessible, allowing anyone to create AI-powered applications at home. Building a personal AI assistant helps manage tasks, answer questions, and integrate with smart devices. Human Insight: I created a small AI assistant on a Raspberry Pi to control my Tunis apartment lights and reminders; it cut morning preparation time by 10 minutes daily while staying fully offline.
1. Why Build Your Own AI Personal Assistant
Creating your own AI assistant gives complete control over data, functionality customization, and hands-on AI experience. Unlike commercial assistants, DIY AI allows tailored responses, task automation, and integration with devices without sending sensitive data to third-party servers. This project is both educational and practical, teaching AI concepts while providing a functional tool for daily life.
2. Understanding the Core AI Components
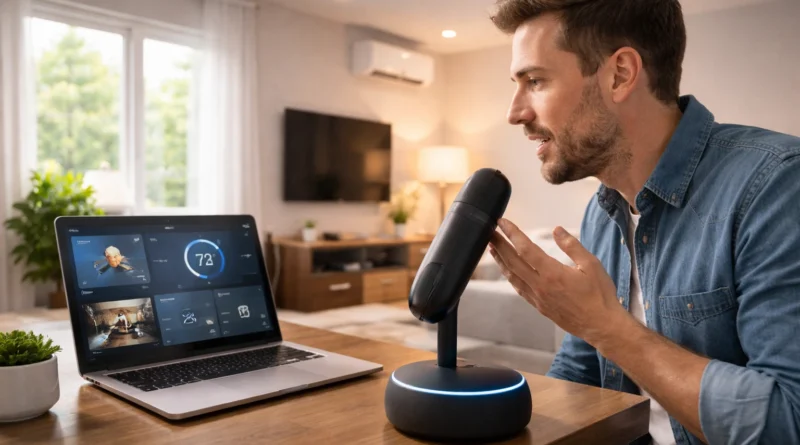
An AI assistant has three main parts: speech recognition, natural language processing (NLP), and task execution. Speech recognition converts voice to text. NLP interprets commands and determines intent. Task execution performs actions like sending messages, turning on smart lights, or fetching information. Understanding these components ensures reliability and responsiveness.
3. Components and Tools Needed
Software: Python, speech recognition libraries (SpeechRecognition, Vosk, Google Speech API), NLP libraries (spaCy, NLTK, Rasa), text-to-speech (gTTS, pyttsx3), optional GUI frameworks.
Hardware: PC or Raspberry Pi, microphone, speakers, optional smart home devices (lights, thermostat, cameras).
Tools: Text editor or IDE (VS Code, PyCharm), internet for package installation, notebook for workflow and design notes.
4. Step-by-Step Installation and Setup
Step 1 – Setting Up the Environment: Install Python and libraries; use virtual environments. Verify microphone and speaker functionality.
Step 2 – Configuring Speech Recognition: Choose a library, configure microphone, test voice-to-text conversion, adjust sensitivity for best accuracy.
Step 3 – Implementing NLP: Parse text commands with NLP libraries; define intents like greetings, weather queries, smart device control, and reminders. Test with sample commands.
Step 4 – Task Execution Module: Map intents to actions: control lights, send emails, fetch web data. Include error handling for unknown commands.
Step 5 – Voice Feedback: Use text-to-speech for spoken responses; configure voice speed, language, and clarity.
Step 6 – Integration with Smart Home Devices: Optional API integration for lights, thermostat, and cameras; test each command individually.
Step 7 – User Interface (Optional): Create a GUI showing recognized commands, current tasks, and responses for monitoring and debugging.
5. Customization and Practical Applications
- Daily Reminders: Schedule tasks and alarms via voice commands.
- Information Retrieval: Ask for weather updates, news, or local events.
- Smart Home Control: Control lights, thermostat, and appliances by voice.
- Productivity Assistance: Set timers, send emails, or manage to-do lists.
- Educational Use: Learn AI concepts by adding new skills or improving NLP accuracy.
6. Troubleshooting and Optimization
- Speech Recognition Errors: Reduce background noise, adjust microphone, retrain models offline if needed.
- Command Misinterpretation: Expand NLP training data, refine intent classification.
- Task Execution Failures: Verify device API credentials, network connectivity, and software version compatibility.
- Slow Performance: Optimize code, reduce unnecessary processes, or upgrade hardware.
7. Security and Privacy Considerations
- Store personal data locally when possible.
- Avoid cloud services for sensitive commands.
- Encrypt communication with smart devices.
- Keep software and dependencies updated to patch vulnerabilities.
8. Energy Efficiency and Resource Management
Running an AI assistant continuously can consume energy. Consider low-power devices like Raspberry Pi. Schedule activity only during necessary hours and implement sleep mode during inactivity to reduce power consumption and prolong device lifespan.
9. Future Enhancements
- Add multilingual support using NLP translation libraries.
- Integrate AI learning modules for improved context understanding.
- Add gesture or camera-based recognition for non-verbal commands.
- Expand smart home integration with more devices and automated routines.
10. FAQ – DIY AI Personal Assistant
Q1: Can I build it entirely offline? A: Yes, using offline speech recognition and NLP models.
Q2: Do I need programming experience? A: Basic Python knowledge is enough; advanced features require more coding.
Q3: Can it replace commercial assistants? A: For personal, customized use, yes; cloud features may be missing.
Q4: Is it safe to integrate with smart home devices? A: Yes, ensure secure API keys and local network usage.
Q5: How long does setup take? A: Typically 3–6 hours for initial setup; more for advanced integrations.